
Latest topics
» Kriegsspiel: A Bridge Too Far (AAR)by Martin Sat Nov 16, 2024 6:31 pm
» targeting artillery targets
by Saucier Tue Oct 29, 2024 12:15 am
» Grog can't make it
by Grog Fri Sep 13, 2024 5:59 pm
» Toggle vegetation = true not working
by popeadrian Fri Aug 30, 2024 11:43 pm
» 1862 Kriegsspiel manual by Von Tschiscwitz
by modron Thu Aug 29, 2024 8:23 pm
» SOW Scenario Generator
by popeadrian Sun Aug 25, 2024 5:39 pm
» Guide to map making?
by popeadrian Wed Aug 14, 2024 1:44 am
» SOWWL Artillery batteries
by Uncle Billy Thu Jul 11, 2024 3:15 pm
» Set Up for SOWWL NAPOLEON GAMES For Kriegspiel style
by Uncle Billy Tue Jul 09, 2024 10:35 pm
» The New SOWWL Is Now Available On Steam
by Grog Mon Jul 08, 2024 8:14 pm
» Boxed KS set Wallington NT near Morpeth
by Martin Sat Jun 08, 2024 3:50 pm
» Help Request-Artillery Behavior
by Dutch101 Mon May 27, 2024 4:08 pm
Statistics
We have 1600 registered usersThe newest registered user is Moromir
Our users have posted a total of 30539 messages in 2305 subjects
Log in
Gettysburg:SOW Napoleonic FAQs
Page 1 of 1

Gettysburg:SOW Napoleonic FAQs
![]() Martin Mon Oct 28, 2013 1:44 pm
Martin Mon Oct 28, 2013 1:44 pm
In recent months a great deal of work had been done on modding Gettysburg for Napoleonic warfare, which the game now actually reflects surprisingly well. The changes make for a very different game than the stock ACW, and even the regulars are still feeling their way, with mistakes being made by everyone each time we play.
We are always keen to attract new players to this wonderful game, and thought it would be a good idea to sticky some FAQs as a guide to new players. Hopefully this will reduce the barriers to entry if you haven't tried this version of the game before.
Although I have come up with the questions, I do not regard myself as particularly knowledgeable about the game, or especially good at playing it! Those who have fought alongside me will therefore be relieved to know that more qualified luminaries have kindly provided answers to my questions. My thanks in particular to Uncle Billy, Digby and Leffe.
This FAQ is a work in progress, so can I ask anyone who has more questions (or who disagrees with any of the current answers!) to please post here https://kriegsspiel.forumotion.net/t901-gettysburgsow-napoleonic-faqs-discussion-thread#8127
Martin (J)
INFANTRY
Q. What formation should I use to advance the bulk of my infantry?
A. You can advance in line or in movement column (column of divisions, or column of companies for the British). Line is slower, but maximises firepower. So you may wish to re-deploy into line as you approach musket range, even if you have advanced in column thus far. Also the game has some difficulty in tracing an efficient path for units manoeuvring while in line formation, so it is better if that is done in movement column.
An advance in line providing you can pour more firepower into his units than he can into yours has obvious attractions. If you command French, consider using the 'ordre-mixte', which provides a combination of line and column for a brigade (see below).
Historical note: The Revolutionary French armies attacked in column behind a powerful skirmish screen. In fact the structure of Revolutionary demi-brigades was predicated on the fact that 2 of the 3 battalions were poorly trained volunteers, who could not have operated effectively in line and would have fared poorly in an exchange of volley fire. The third battalion, composed of regulars from the old Royal Army, provided the firepower. This was reflected in the 'ordre-mixte' formation, where the veterans operated in line and the new battalions in column. This gave a brigade a wide firing line and a compact formation.
On some occasions there seems to have been an attempt by the French to advance in column and then deploy into line for an exchange of volleys. At any rate Chandler came to the view that these were the French intended tactics at Maida in 1806, although they didn’t work well, because deploying under fire was not really practical. More generally, one advantage of Wellington's reverse slope deployments, was to make it difficult for the French to judge when to redeploy.
Q. How do I advance with infantry against enemy infantry?
A. For best results you should first prepare by wearing down the enemy line. There are two main ways of doing this:
(a) By deploying skirmishers who will operate ahead of your own main line and weaken the enemy with accurate fire. If the enemy deploys skirmishers too, you should attempt to deploy more, and force his skirmishers to retire. Your own can then fire on his main line, which will gradually cause them casualties and sap their morale. Your own skirmishers are well spread so do not offer a good target for enemy fire.
Skirmishers should go ahead no more than 200 to 300 yards from formed supporting troops as they are extremely vulnerable to enemy cavalry attack and even enemy infantry charges if caught. Not giving them "Take Command" orders allows them to retire ahead of an enemy attack, though they will also retire ahead of enemy skirmishers as well.
(b) By placing your artillery to fire directly at the enemy line. This again will cause them casualties and sap their morale. Given sufficient guns, it is normally faster than using skirmishers.
Which you choose will depend on the strengths and weaknesses of your own force. Not all units have the ability to skirmish, and some who can are not particularly good at it. If this applies to your force, but you have good artillery, you might choose method (b).
Historical note. The French developed effective skirmishing skills during the French Revolutionary War and the early part of the Napoleonic War. This was partly through necessity as their artillery was not especially good in the earlier period. During the later part of the Napoleonic War, the French artillery arm improved greatly both in quality and numbers. Conversely the quality of infantry recruits declined due to the unceasing demands of the wars and the inclusion of large numbers of foreign troops. This led to a switch from a reliance on skirmishing to the use of massed artillery to degrade the enemy infantry. Most other armies failed to match the French skirmishers, although Wellington’s Peninsular Army and the late Prussians had numerous effective skirmishing units.
Q. Can infantry advance in square?
A. Yes they can, but very slowly. This does provide protection from cavalry attack, but also means they potentially take fire for longer.
Historical note: It does seem to have been possible for squares to move, but only for extremely well-trained troops. Although there is some dispute on the matter, the balance of opinion is that the Imperial Guard advanced in this formation at Waterloo. Due to game limitations, it is not possible to make this distinction in SOW, so all troops can do it. This does raise the question re whether it might be less inaccurate to say that no troops can?
Q. How effective are squares when firing?
A. Squares fire at 50% in the direction their flag is facing, and at much reduced strength from their remaining 3 sides.
Historical note: In reality, squares could only fire at c25% effectiveness in any one direction, given that 75% of the men would always be facing the wrong way. This is one of the very few areas where it has not between possible to mod the game quite as we would wish.
Q. As well as being less effective at firing, are squares also more susceptible to casualties?
A. Yes, squares are more vulnerable to artillery fire. Artillery fire is an area effect, so bunched up soldiers will take more casualties.
Historical note: Each army used its own version of the square. Some were solid but more often they were hollow (as represented in the game). Whilst one could argue that a hollow square had no more depth than a line, even this formation was very vulnerable to artillery fire, because round-shot would penetrate opposite sides.
Q. How long does it take to form square?
A. Although it takes several seconds for the square to form, the game effect is instant as soon as the order has been received. Cavalry commanders should be aware of this!
Historical note: This is slightly unrealistic, and is one of the very few areas where it has not between possible to mod the game as we would wish. On the other hand, infantry commanders will need to be alert to the danger from cavalry and issue the necessary orders in time. If the commander is not nearby, a courier will also need to reach the infantry for the orders to take effect.
This does not always occur! Unless the commander is very nearby, the race between the courier and attacking cavalry is a coin toss. This would represent infantry panic and failing to successfully form a square.
Q. Which formations are most effective in hand-to-hand fighting?
A. From a melee perspective, the strongest formation is the square, but it is extremely slow. Below that, in order of melee effectiveness are movement column (ie column of divisions), line, march column and, lastly, skirmish formation.
Historical note: Provided it could survive incoming fire long enough to close, the movement column had an advantage over the line in melee,. This is because the line was so long and thin. If a column broke though, all command and control would be lost, and morale would probably collapse too.
Q. Does infantry fire decrease in either frequency or accuracy as the troops get more fatigued?
A. Fatigue has a very small effect on the rate of fire, (1% when exhausted). Also, severe fatigue gives the enemy unit firing at the tired men a small bonus, (1-2.5%).
Q. How should I employ skirmishers to weaken an enemy infantry line?
A. All brigades will have at least one unit capable of skirmishing. It is often a good idea to deploy this battalion ahead of the rest of the brigade when it advances. Your AI brigade commanders will automatically do this if you order them to deploy using one of the formation-with-skirmishers buttons (line, column of divisions, order-mixte). If any other formations is selected, the player will have to put the skirmish battalion in front and order it into skirmish mode manually.
Game note: skirmishers are not an overwhelming force. The AI does a decent job of driving them back. They auto-retreat whenever an enemy unit gets within 75 yd. If they don't, which does happen, they are savaged in a melee with troops in line or column.
Q. Which battalions in a brigade are capable of skirmishing?
The 2nd battalion in the brigade OOB will automatically fight in skirmish formation. Most French 1st battalions can be deployed manually in skirmish formation by the player. HOWEVER, all Brit rifle battalions and Austrian jaegers will automatically fight in skirmish formation. All French legere, voltigeurs, jaegers and light infantry battalions can be deployed as skirmishers manually.
Historical note: Nearly all French battalions were trained in skirmish tactics, although it was rare to find them all deployed in this role. By the latter years of the wars, it was frequently the case that more than one battalion in brigades of other armies were also capable of skirmishing. In most cases we are currently limiting skirmish-capable units to a maximum of two per brigade, to prevent players exploiting this flexibility in an unhistorical manner. Jaeger and legere brigades have the capability of deploying all their battalions as skirmishers however.
Q. If I have them, should I use more than one skirmisher battalion on a brigade front – ie should I overlap my skirmisher battalions?
No. Putting two skirmish battalions in the same space does not double the firepower, anymore than does placing two line formation in the same space. The one in front will block the one in the rear unless it is at a higher elevation.
Q. Should I TC my skirmish battalions?
A. This is generally not recommended, as you will then need to constantly attend to them, otherwise they will be vulnerable to being charged and destroyed. We suggest that you only TC them if you wish to move them to a very specific location. Then I immediately unTC them and let them do their thing.
Q How should I counter enemy skirmishers which are harassing my own line?
A. The most effective method is to ride them down with cavalry. However cavalry are never there when you need them, so a good alternative is to deploy skirmishers of your own, preferably in greater numbers. But you may not have any. Another possibility is to rapidly advance your main infantry line, which may even catch the skirmishers, but might also leave you out of position.
Historical note: Up until the later war years, Allied armies found it difficult to counter French skirmisher tactics. As time went on however, most other armies did field more units capable of skirmishing, and this paralleled a decline in the quality of French infantry. So in scenarios set in the later wars, this French advantage will be much less of a factor.
Q. Will my AI brigade commanders use skirmishers? And will an AI opponent use them?
A. Yes in both cases.
Q. How will skirmishers fare against an artillery battery?
A. That will depend on what ammo the battery is using. Round-shot will do little damage to them, given their dispersed formation, but canister can cause them significant losses. For this reason, skirmishers are unlikely to do well against a battery.
CAVALRY
Q. How should I deploy my cavalry to engage other cavalry?
A. You should ideally deploy in a line of squadrons with a second line to the rear. Having friendly squadrons nearby helps prevent a morally suspect unit from routing, so it may melee longer than it would otherwise.
A second line can also protect retreating units from your first line from further attack.
Historical note: Cavalry brigades were normally drawn up in 2 lines of squadrons for the above reasons.
Q. Does the type of cavalry have any influence in combat – eg do cuirassiers have any advantage over say hussars?
A. Cavalry are broadly classified as heavy, medium or light. Heavy and medium cavalry are big men on big horses, and are best suited for charging. Light cavalry are used for scouting, skirmishing, and pursuing a beaten foe. They can charge as well, but are likely to be at a slight disadvantage against ‘heavier’ opponents. These are generalisations, and some good quality light cavalry can outmatch poor quality heavy or medium cavalry. They can also succeed with a well-timed charge if the enemy are ‘winded’ or caught in flank or rear. This is particularly so as, due to game-engine limitations, the heavy cavalry are perhaps less powerful than they should be.
Historical note. Cuirassiers and carabiniers were reckoned as heavy cavalry, and frequently armoured. Dragoons by this period were rarely used in their traditional dismounted role, and were regarded as medium cavalry. The French used many dragoon regiments in Spain, where the heavy cavalry were difficult to maintain. Light dragoons, hussars, chasseurs and cheavaux-legers were light cavalry. Lancers were sometimes classed as medium and sometimes as light.
At this time the British mounted arm was generally thought to have the best horseflesh in Europe and while dragoons would be medium cavalry in all other armies, in the British army, dragoon and dragoon guard regiments should be counted as heavy cavalry. There is an argument that even the British light dragoons should be treated as a heavier class, due to the size of their horses.
Q. I note that infantry in column of companies can expect to beat a line in melee, but is this also true for cavalry?
A. Cavalry in column of divisions fights at only 50% of its capability in line. You should not expect that formation to win any melees with infantry.
Historical note: Unlike infantry battalions, the smaller cavalry squadrons were trained to engage in melee in line. The size of the squadron was in fact a function of how large a frontage could be controlled by one commander in the heat of battle. Squadrons operating in column could move somewhat faster than those in line, but would be at a disadvantage in melee, due to the smaller number of troopers who could engage in combat.
ARTILLERY
Q. Is it safe to leave target and ammo selection to the AI?
A. Yes. There are really only two types for each gun: round shot and canister. And canister is only fired at ranges of 200 yd. or less.
Historical note: This reflects the more limited range of ammunition types in the Napoleonic period.
Q. Is it worth firing at other artillery, or is it more effective to fire at infantry and cavalry?
A. Although it is a great temptation to fire at the enemy guns, it is most effective to fire at the troops.
Historical note: Some commanders issued strict instructions that their guns should not waste ammunition in counter-battery fire, because they felt fire was more effective against troops. This was not always observed, and sometimes – eg where you had clear artillery superiority – there was an arguable case for driving off the enemy’s guns before you launched an attack.
Q. How do I know how effective my artillery pieces are?
A. Guns are usually described as 6-pounders, 8-pounders etc. In general, higher figures are better as they indicate a larger gun which can fire further. The effect of a solid shot hit is determined by placing a narrow rectangle at the point of impact and killing everything in that area.
Historical note: The numbers indicated the weight of projectile the particular gun could fire. Heavier guns could outrange lighter ones and could therefore destroy them, or drive them off, from a distance. The heaviest gun used in the field at this period was the 12-pounder. Such a large piece also fired with and more destructive effect than a lighter one, but that is not currently reflected in the game.
Q. What are the most profitable formations to fire at?
A. Always try to fire in enfilade or troops with deep formation. You want the rectangle to cover as many troops as possible.
Historical note: Artillery was most effective against troops in dense formations – eg infantry in column and particularly square. This was because each ball had the potential to cause multiple casualties. Canister was even more effective against such formations. Enfilading enemy formations was particularly effective, even against a thin line, as the shot could travel the length of it.
Q. Does artillery fire reduce in effectiveness as it becomes more fatigued?
A. Yes, but only to a small extent. Surprisingly it does not take a longer time to reload and fire, due to fatigue. This is true for infantry too.
Historical note: Working the guns was probably the most exhausting task on the battlefield, in view of their weight, and the need to reposition them after each firing due to recoil. Commanders often initially kept some batteries in reserve for this reason. These could be used to relieve tired batteries during the battle, and thus maintain fire.
TOOLBAR
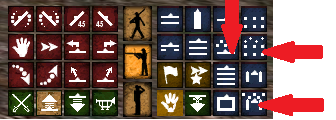
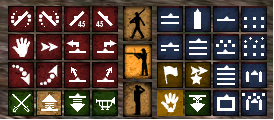
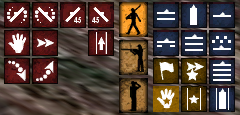
Q. Why has the toolbar changed for this version of the game?
A. This is to reflect the differences between Napoleonic Wars and the ACW. Most buttons remain the same, but a few new ones have been added for infantry, to reflect the wider variety of formations in frequent use.
Historical note: Napoleonic infantry formations were more numerous than those of the ACW, because in some ways they operated on a more complex battle environment. The more open battlefields, and the presence of powerful artillery and cavalry meant that infantry needed to be more adaptable to different opportunities and threats. Examples of these are the 'square' and 'ordre-mixte' formations. The latter used only by the French.
Q. How do I get infantry or cavalry to hold formation when they advance in the presence of the enemy?
A. If you are using the toolbar to give orders, then do you should do so in combat mode.
If you use the same buttons in movement mode, your brigades will advance in road column and attempt to go into the specified formation on arrival.
This is a change from the stock game. In the stock game, the formations in the movement and combat panels were the same. Now they are very different.
Historical note: When advancing, road column was the most efficient formation to adopt. With the enemy nearby however, troops advanced in movement column (column of divisions/companies) or in line, for reasons of security.
We are always keen to attract new players to this wonderful game, and thought it would be a good idea to sticky some FAQs as a guide to new players. Hopefully this will reduce the barriers to entry if you haven't tried this version of the game before.
Although I have come up with the questions, I do not regard myself as particularly knowledgeable about the game, or especially good at playing it! Those who have fought alongside me will therefore be relieved to know that more qualified luminaries have kindly provided answers to my questions. My thanks in particular to Uncle Billy, Digby and Leffe.
This FAQ is a work in progress, so can I ask anyone who has more questions (or who disagrees with any of the current answers!) to please post here https://kriegsspiel.forumotion.net/t901-gettysburgsow-napoleonic-faqs-discussion-thread#8127
Martin (J)
INFANTRY
Q. What formation should I use to advance the bulk of my infantry?
A. You can advance in line or in movement column (column of divisions, or column of companies for the British). Line is slower, but maximises firepower. So you may wish to re-deploy into line as you approach musket range, even if you have advanced in column thus far. Also the game has some difficulty in tracing an efficient path for units manoeuvring while in line formation, so it is better if that is done in movement column.
An advance in line providing you can pour more firepower into his units than he can into yours has obvious attractions. If you command French, consider using the 'ordre-mixte', which provides a combination of line and column for a brigade (see below).
Historical note: The Revolutionary French armies attacked in column behind a powerful skirmish screen. In fact the structure of Revolutionary demi-brigades was predicated on the fact that 2 of the 3 battalions were poorly trained volunteers, who could not have operated effectively in line and would have fared poorly in an exchange of volley fire. The third battalion, composed of regulars from the old Royal Army, provided the firepower. This was reflected in the 'ordre-mixte' formation, where the veterans operated in line and the new battalions in column. This gave a brigade a wide firing line and a compact formation.
On some occasions there seems to have been an attempt by the French to advance in column and then deploy into line for an exchange of volleys. At any rate Chandler came to the view that these were the French intended tactics at Maida in 1806, although they didn’t work well, because deploying under fire was not really practical. More generally, one advantage of Wellington's reverse slope deployments, was to make it difficult for the French to judge when to redeploy.
Q. How do I advance with infantry against enemy infantry?
A. For best results you should first prepare by wearing down the enemy line. There are two main ways of doing this:
(a) By deploying skirmishers who will operate ahead of your own main line and weaken the enemy with accurate fire. If the enemy deploys skirmishers too, you should attempt to deploy more, and force his skirmishers to retire. Your own can then fire on his main line, which will gradually cause them casualties and sap their morale. Your own skirmishers are well spread so do not offer a good target for enemy fire.
Skirmishers should go ahead no more than 200 to 300 yards from formed supporting troops as they are extremely vulnerable to enemy cavalry attack and even enemy infantry charges if caught. Not giving them "Take Command" orders allows them to retire ahead of an enemy attack, though they will also retire ahead of enemy skirmishers as well.
(b) By placing your artillery to fire directly at the enemy line. This again will cause them casualties and sap their morale. Given sufficient guns, it is normally faster than using skirmishers.
Which you choose will depend on the strengths and weaknesses of your own force. Not all units have the ability to skirmish, and some who can are not particularly good at it. If this applies to your force, but you have good artillery, you might choose method (b).
Historical note. The French developed effective skirmishing skills during the French Revolutionary War and the early part of the Napoleonic War. This was partly through necessity as their artillery was not especially good in the earlier period. During the later part of the Napoleonic War, the French artillery arm improved greatly both in quality and numbers. Conversely the quality of infantry recruits declined due to the unceasing demands of the wars and the inclusion of large numbers of foreign troops. This led to a switch from a reliance on skirmishing to the use of massed artillery to degrade the enemy infantry. Most other armies failed to match the French skirmishers, although Wellington’s Peninsular Army and the late Prussians had numerous effective skirmishing units.
Q. Can infantry advance in square?
A. Yes they can, but very slowly. This does provide protection from cavalry attack, but also means they potentially take fire for longer.
Historical note: It does seem to have been possible for squares to move, but only for extremely well-trained troops. Although there is some dispute on the matter, the balance of opinion is that the Imperial Guard advanced in this formation at Waterloo. Due to game limitations, it is not possible to make this distinction in SOW, so all troops can do it. This does raise the question re whether it might be less inaccurate to say that no troops can?
Q. How effective are squares when firing?
A. Squares fire at 50% in the direction their flag is facing, and at much reduced strength from their remaining 3 sides.
Historical note: In reality, squares could only fire at c25% effectiveness in any one direction, given that 75% of the men would always be facing the wrong way. This is one of the very few areas where it has not between possible to mod the game quite as we would wish.
Q. As well as being less effective at firing, are squares also more susceptible to casualties?
A. Yes, squares are more vulnerable to artillery fire. Artillery fire is an area effect, so bunched up soldiers will take more casualties.
Historical note: Each army used its own version of the square. Some were solid but more often they were hollow (as represented in the game). Whilst one could argue that a hollow square had no more depth than a line, even this formation was very vulnerable to artillery fire, because round-shot would penetrate opposite sides.
Q. How long does it take to form square?
A. Although it takes several seconds for the square to form, the game effect is instant as soon as the order has been received. Cavalry commanders should be aware of this!
Historical note: This is slightly unrealistic, and is one of the very few areas where it has not between possible to mod the game as we would wish. On the other hand, infantry commanders will need to be alert to the danger from cavalry and issue the necessary orders in time. If the commander is not nearby, a courier will also need to reach the infantry for the orders to take effect.
This does not always occur! Unless the commander is very nearby, the race between the courier and attacking cavalry is a coin toss. This would represent infantry panic and failing to successfully form a square.
Q. Which formations are most effective in hand-to-hand fighting?
A. From a melee perspective, the strongest formation is the square, but it is extremely slow. Below that, in order of melee effectiveness are movement column (ie column of divisions), line, march column and, lastly, skirmish formation.
Historical note: Provided it could survive incoming fire long enough to close, the movement column had an advantage over the line in melee,. This is because the line was so long and thin. If a column broke though, all command and control would be lost, and morale would probably collapse too.
Q. Does infantry fire decrease in either frequency or accuracy as the troops get more fatigued?
A. Fatigue has a very small effect on the rate of fire, (1% when exhausted). Also, severe fatigue gives the enemy unit firing at the tired men a small bonus, (1-2.5%).
Q. How should I employ skirmishers to weaken an enemy infantry line?
A. All brigades will have at least one unit capable of skirmishing. It is often a good idea to deploy this battalion ahead of the rest of the brigade when it advances. Your AI brigade commanders will automatically do this if you order them to deploy using one of the formation-with-skirmishers buttons (line, column of divisions, order-mixte). If any other formations is selected, the player will have to put the skirmish battalion in front and order it into skirmish mode manually.

Game note: skirmishers are not an overwhelming force. The AI does a decent job of driving them back. They auto-retreat whenever an enemy unit gets within 75 yd. If they don't, which does happen, they are savaged in a melee with troops in line or column.
Q. Which battalions in a brigade are capable of skirmishing?
The 2nd battalion in the brigade OOB will automatically fight in skirmish formation. Most French 1st battalions can be deployed manually in skirmish formation by the player. HOWEVER, all Brit rifle battalions and Austrian jaegers will automatically fight in skirmish formation. All French legere, voltigeurs, jaegers and light infantry battalions can be deployed as skirmishers manually.
Historical note: Nearly all French battalions were trained in skirmish tactics, although it was rare to find them all deployed in this role. By the latter years of the wars, it was frequently the case that more than one battalion in brigades of other armies were also capable of skirmishing. In most cases we are currently limiting skirmish-capable units to a maximum of two per brigade, to prevent players exploiting this flexibility in an unhistorical manner. Jaeger and legere brigades have the capability of deploying all their battalions as skirmishers however.
Q. If I have them, should I use more than one skirmisher battalion on a brigade front – ie should I overlap my skirmisher battalions?
No. Putting two skirmish battalions in the same space does not double the firepower, anymore than does placing two line formation in the same space. The one in front will block the one in the rear unless it is at a higher elevation.
Q. Should I TC my skirmish battalions?
A. This is generally not recommended, as you will then need to constantly attend to them, otherwise they will be vulnerable to being charged and destroyed. We suggest that you only TC them if you wish to move them to a very specific location. Then I immediately unTC them and let them do their thing.
Q How should I counter enemy skirmishers which are harassing my own line?
A. The most effective method is to ride them down with cavalry. However cavalry are never there when you need them, so a good alternative is to deploy skirmishers of your own, preferably in greater numbers. But you may not have any. Another possibility is to rapidly advance your main infantry line, which may even catch the skirmishers, but might also leave you out of position.
Historical note: Up until the later war years, Allied armies found it difficult to counter French skirmisher tactics. As time went on however, most other armies did field more units capable of skirmishing, and this paralleled a decline in the quality of French infantry. So in scenarios set in the later wars, this French advantage will be much less of a factor.
Q. Will my AI brigade commanders use skirmishers? And will an AI opponent use them?
A. Yes in both cases.
Q. How will skirmishers fare against an artillery battery?
A. That will depend on what ammo the battery is using. Round-shot will do little damage to them, given their dispersed formation, but canister can cause them significant losses. For this reason, skirmishers are unlikely to do well against a battery.
CAVALRY
Q. How should I deploy my cavalry to engage other cavalry?
A. You should ideally deploy in a line of squadrons with a second line to the rear. Having friendly squadrons nearby helps prevent a morally suspect unit from routing, so it may melee longer than it would otherwise.
A second line can also protect retreating units from your first line from further attack.
Historical note: Cavalry brigades were normally drawn up in 2 lines of squadrons for the above reasons.
Q. Does the type of cavalry have any influence in combat – eg do cuirassiers have any advantage over say hussars?
A. Cavalry are broadly classified as heavy, medium or light. Heavy and medium cavalry are big men on big horses, and are best suited for charging. Light cavalry are used for scouting, skirmishing, and pursuing a beaten foe. They can charge as well, but are likely to be at a slight disadvantage against ‘heavier’ opponents. These are generalisations, and some good quality light cavalry can outmatch poor quality heavy or medium cavalry. They can also succeed with a well-timed charge if the enemy are ‘winded’ or caught in flank or rear. This is particularly so as, due to game-engine limitations, the heavy cavalry are perhaps less powerful than they should be.
Historical note. Cuirassiers and carabiniers were reckoned as heavy cavalry, and frequently armoured. Dragoons by this period were rarely used in their traditional dismounted role, and were regarded as medium cavalry. The French used many dragoon regiments in Spain, where the heavy cavalry were difficult to maintain. Light dragoons, hussars, chasseurs and cheavaux-legers were light cavalry. Lancers were sometimes classed as medium and sometimes as light.
At this time the British mounted arm was generally thought to have the best horseflesh in Europe and while dragoons would be medium cavalry in all other armies, in the British army, dragoon and dragoon guard regiments should be counted as heavy cavalry. There is an argument that even the British light dragoons should be treated as a heavier class, due to the size of their horses.
Q. I note that infantry in column of companies can expect to beat a line in melee, but is this also true for cavalry?
A. Cavalry in column of divisions fights at only 50% of its capability in line. You should not expect that formation to win any melees with infantry.
Historical note: Unlike infantry battalions, the smaller cavalry squadrons were trained to engage in melee in line. The size of the squadron was in fact a function of how large a frontage could be controlled by one commander in the heat of battle. Squadrons operating in column could move somewhat faster than those in line, but would be at a disadvantage in melee, due to the smaller number of troopers who could engage in combat.
ARTILLERY
Q. Is it safe to leave target and ammo selection to the AI?
A. Yes. There are really only two types for each gun: round shot and canister. And canister is only fired at ranges of 200 yd. or less.
Historical note: This reflects the more limited range of ammunition types in the Napoleonic period.
Q. Is it worth firing at other artillery, or is it more effective to fire at infantry and cavalry?
A. Although it is a great temptation to fire at the enemy guns, it is most effective to fire at the troops.
Historical note: Some commanders issued strict instructions that their guns should not waste ammunition in counter-battery fire, because they felt fire was more effective against troops. This was not always observed, and sometimes – eg where you had clear artillery superiority – there was an arguable case for driving off the enemy’s guns before you launched an attack.
Q. How do I know how effective my artillery pieces are?
A. Guns are usually described as 6-pounders, 8-pounders etc. In general, higher figures are better as they indicate a larger gun which can fire further. The effect of a solid shot hit is determined by placing a narrow rectangle at the point of impact and killing everything in that area.
Historical note: The numbers indicated the weight of projectile the particular gun could fire. Heavier guns could outrange lighter ones and could therefore destroy them, or drive them off, from a distance. The heaviest gun used in the field at this period was the 12-pounder. Such a large piece also fired with and more destructive effect than a lighter one, but that is not currently reflected in the game.
Q. What are the most profitable formations to fire at?
A. Always try to fire in enfilade or troops with deep formation. You want the rectangle to cover as many troops as possible.
Historical note: Artillery was most effective against troops in dense formations – eg infantry in column and particularly square. This was because each ball had the potential to cause multiple casualties. Canister was even more effective against such formations. Enfilading enemy formations was particularly effective, even against a thin line, as the shot could travel the length of it.
Q. Does artillery fire reduce in effectiveness as it becomes more fatigued?
A. Yes, but only to a small extent. Surprisingly it does not take a longer time to reload and fire, due to fatigue. This is true for infantry too.
Historical note: Working the guns was probably the most exhausting task on the battlefield, in view of their weight, and the need to reposition them after each firing due to recoil. Commanders often initially kept some batteries in reserve for this reason. These could be used to relieve tired batteries during the battle, and thus maintain fire.
TOOLBAR
Q. Why has the toolbar changed for this version of the game?
A. This is to reflect the differences between Napoleonic Wars and the ACW. Most buttons remain the same, but a few new ones have been added for infantry, to reflect the wider variety of formations in frequent use.
Historical note: Napoleonic infantry formations were more numerous than those of the ACW, because in some ways they operated on a more complex battle environment. The more open battlefields, and the presence of powerful artillery and cavalry meant that infantry needed to be more adaptable to different opportunities and threats. Examples of these are the 'square' and 'ordre-mixte' formations. The latter used only by the French.
Q. How do I get infantry or cavalry to hold formation when they advance in the presence of the enemy?
A. If you are using the toolbar to give orders, then do you should do so in combat mode.

If you use the same buttons in movement mode, your brigades will advance in road column and attempt to go into the specified formation on arrival.

This is a change from the stock game. In the stock game, the formations in the movement and combat panels were the same. Now they are very different.
Historical note: When advancing, road column was the most efficient formation to adopt. With the enemy nearby however, troops advanced in movement column (column of divisions/companies) or in line, for reasons of security.
Martin- Posts : 2523
Join date : 2008-12-20
Location : London
» Gettysburg:SOW Napoleonic FAQs - discussion thread
» Napoleonic Gettysburg mod
» Gettysburg Map
» Gettysburg MP player numbers
» Is it possible to have two Gettysburg installations on the same pc ?
» Napoleonic Gettysburg mod
» Gettysburg Map
» Gettysburg MP player numbers
» Is it possible to have two Gettysburg installations on the same pc ?
Page 1 of 1
Permissions in this forum:
You cannot reply to topics in this forum